If you’ve recently bought yourself one of the best Mac models on the market and are eagerly awaiting its arrival at your doorstep, buckle up, as there are quite a few things to know about its operating system, especially if you’re coming from a Windows device.
While Setup Assistant — the startup tool built by Apple — will help get the basic settings sorted, the tips we’ve covered here are our top recommendations to help you make the most of your new Mac from the get-go.
1. Setup your Apple ID
While creating and setting up an Apple ID is part of the initial configuration on Mac, it is a step you can skip. But when it comes to making the most of your new computer, having it set from the start is important, especially for the integration it offers with other Apple devices you may own. Also, services like the App Store, iCloud, Messages, and FaceTime are all locked behind an Apple ID.
If you already have an Apple ID logged into a device running macOS 12 or later, iOS 15 or later, or iPadOS 15 or later, an option for express setup will appear — denoted by Make This Your New Mac — which pulls settings stored in your iCloud account, helping you skip a lot of the steps prompted by Setup Assistant.
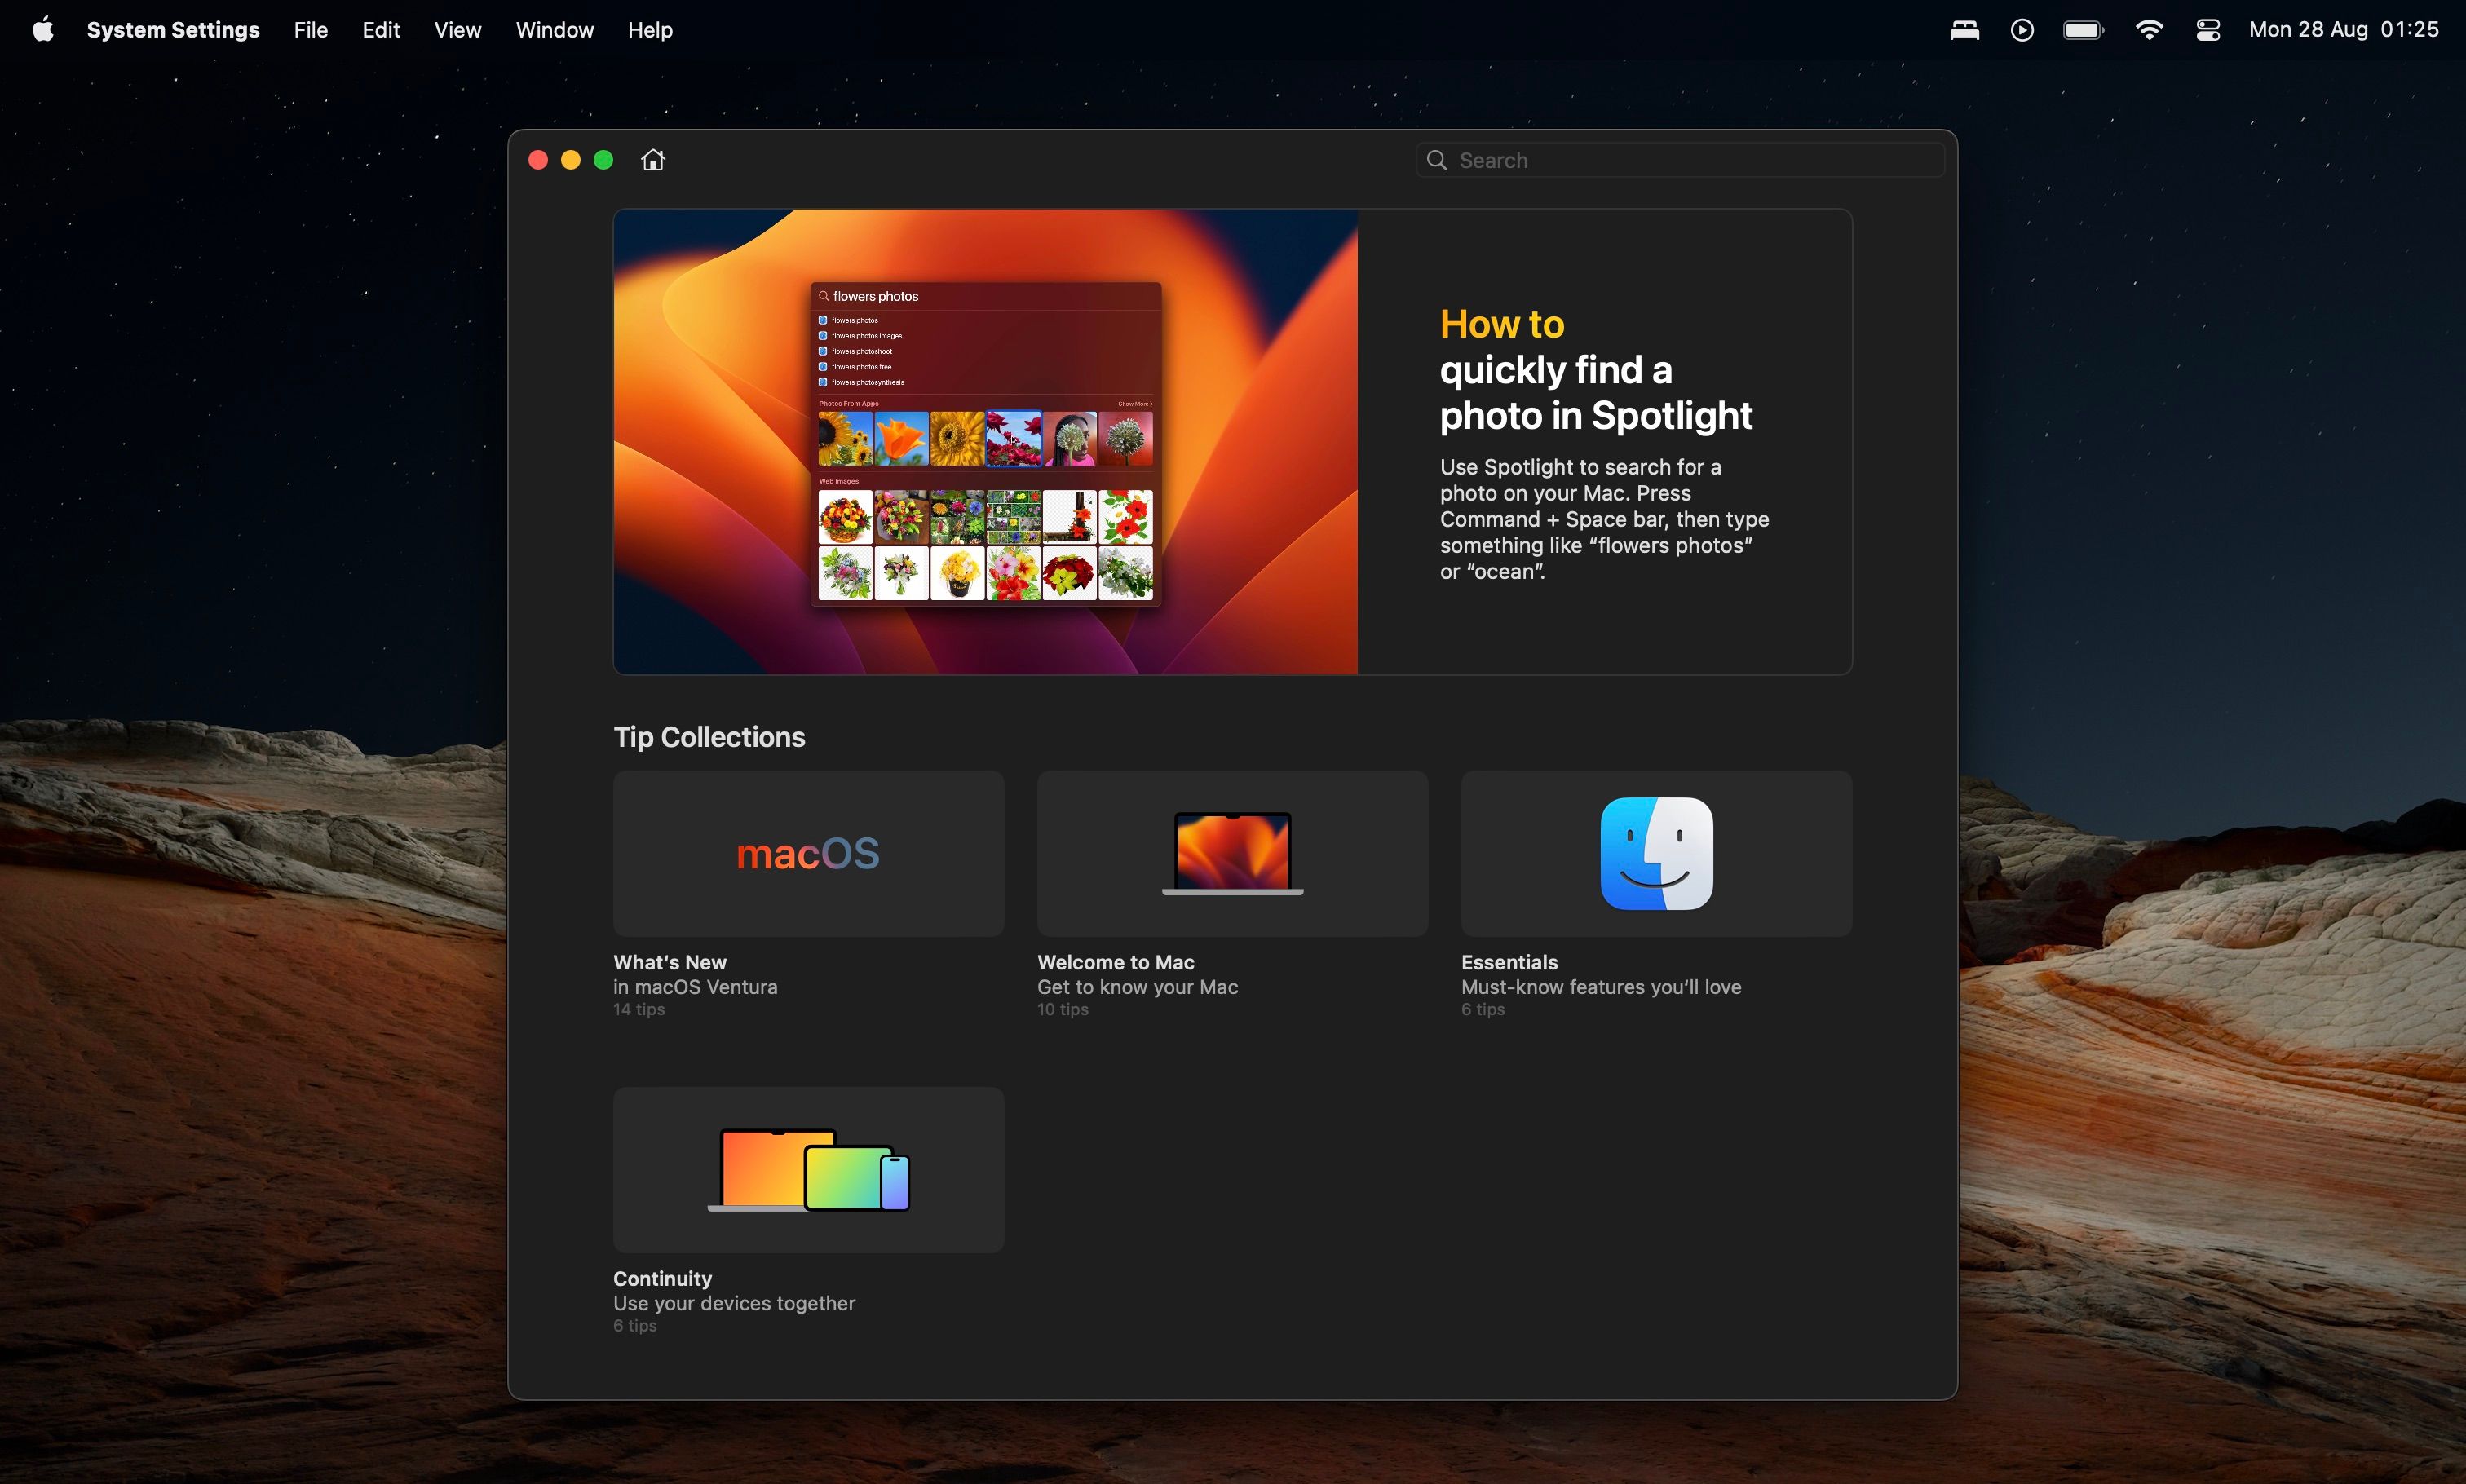
Next is knowing how to access a pool of macOS knowledge via the Help menu, as the age of physical owner manuals and guides is gone.
Located in the menu bar at the top of your Mac device’s screen, the Help button is a context-aware element that changes available options and the shared information based on the application you’re using. It also features a search box that can answer various questions and help find settings hidden behind multiple tabs.
If you’re using the Help menu in Finder, you can access a more comprehensive guide about your Mac device and its features. It also shares snippets about the macOS version you’re using. Keep an eye out for it when macOS Sonoma makes its way to your Mac device in Fall 2023.
3. Customize the Dock
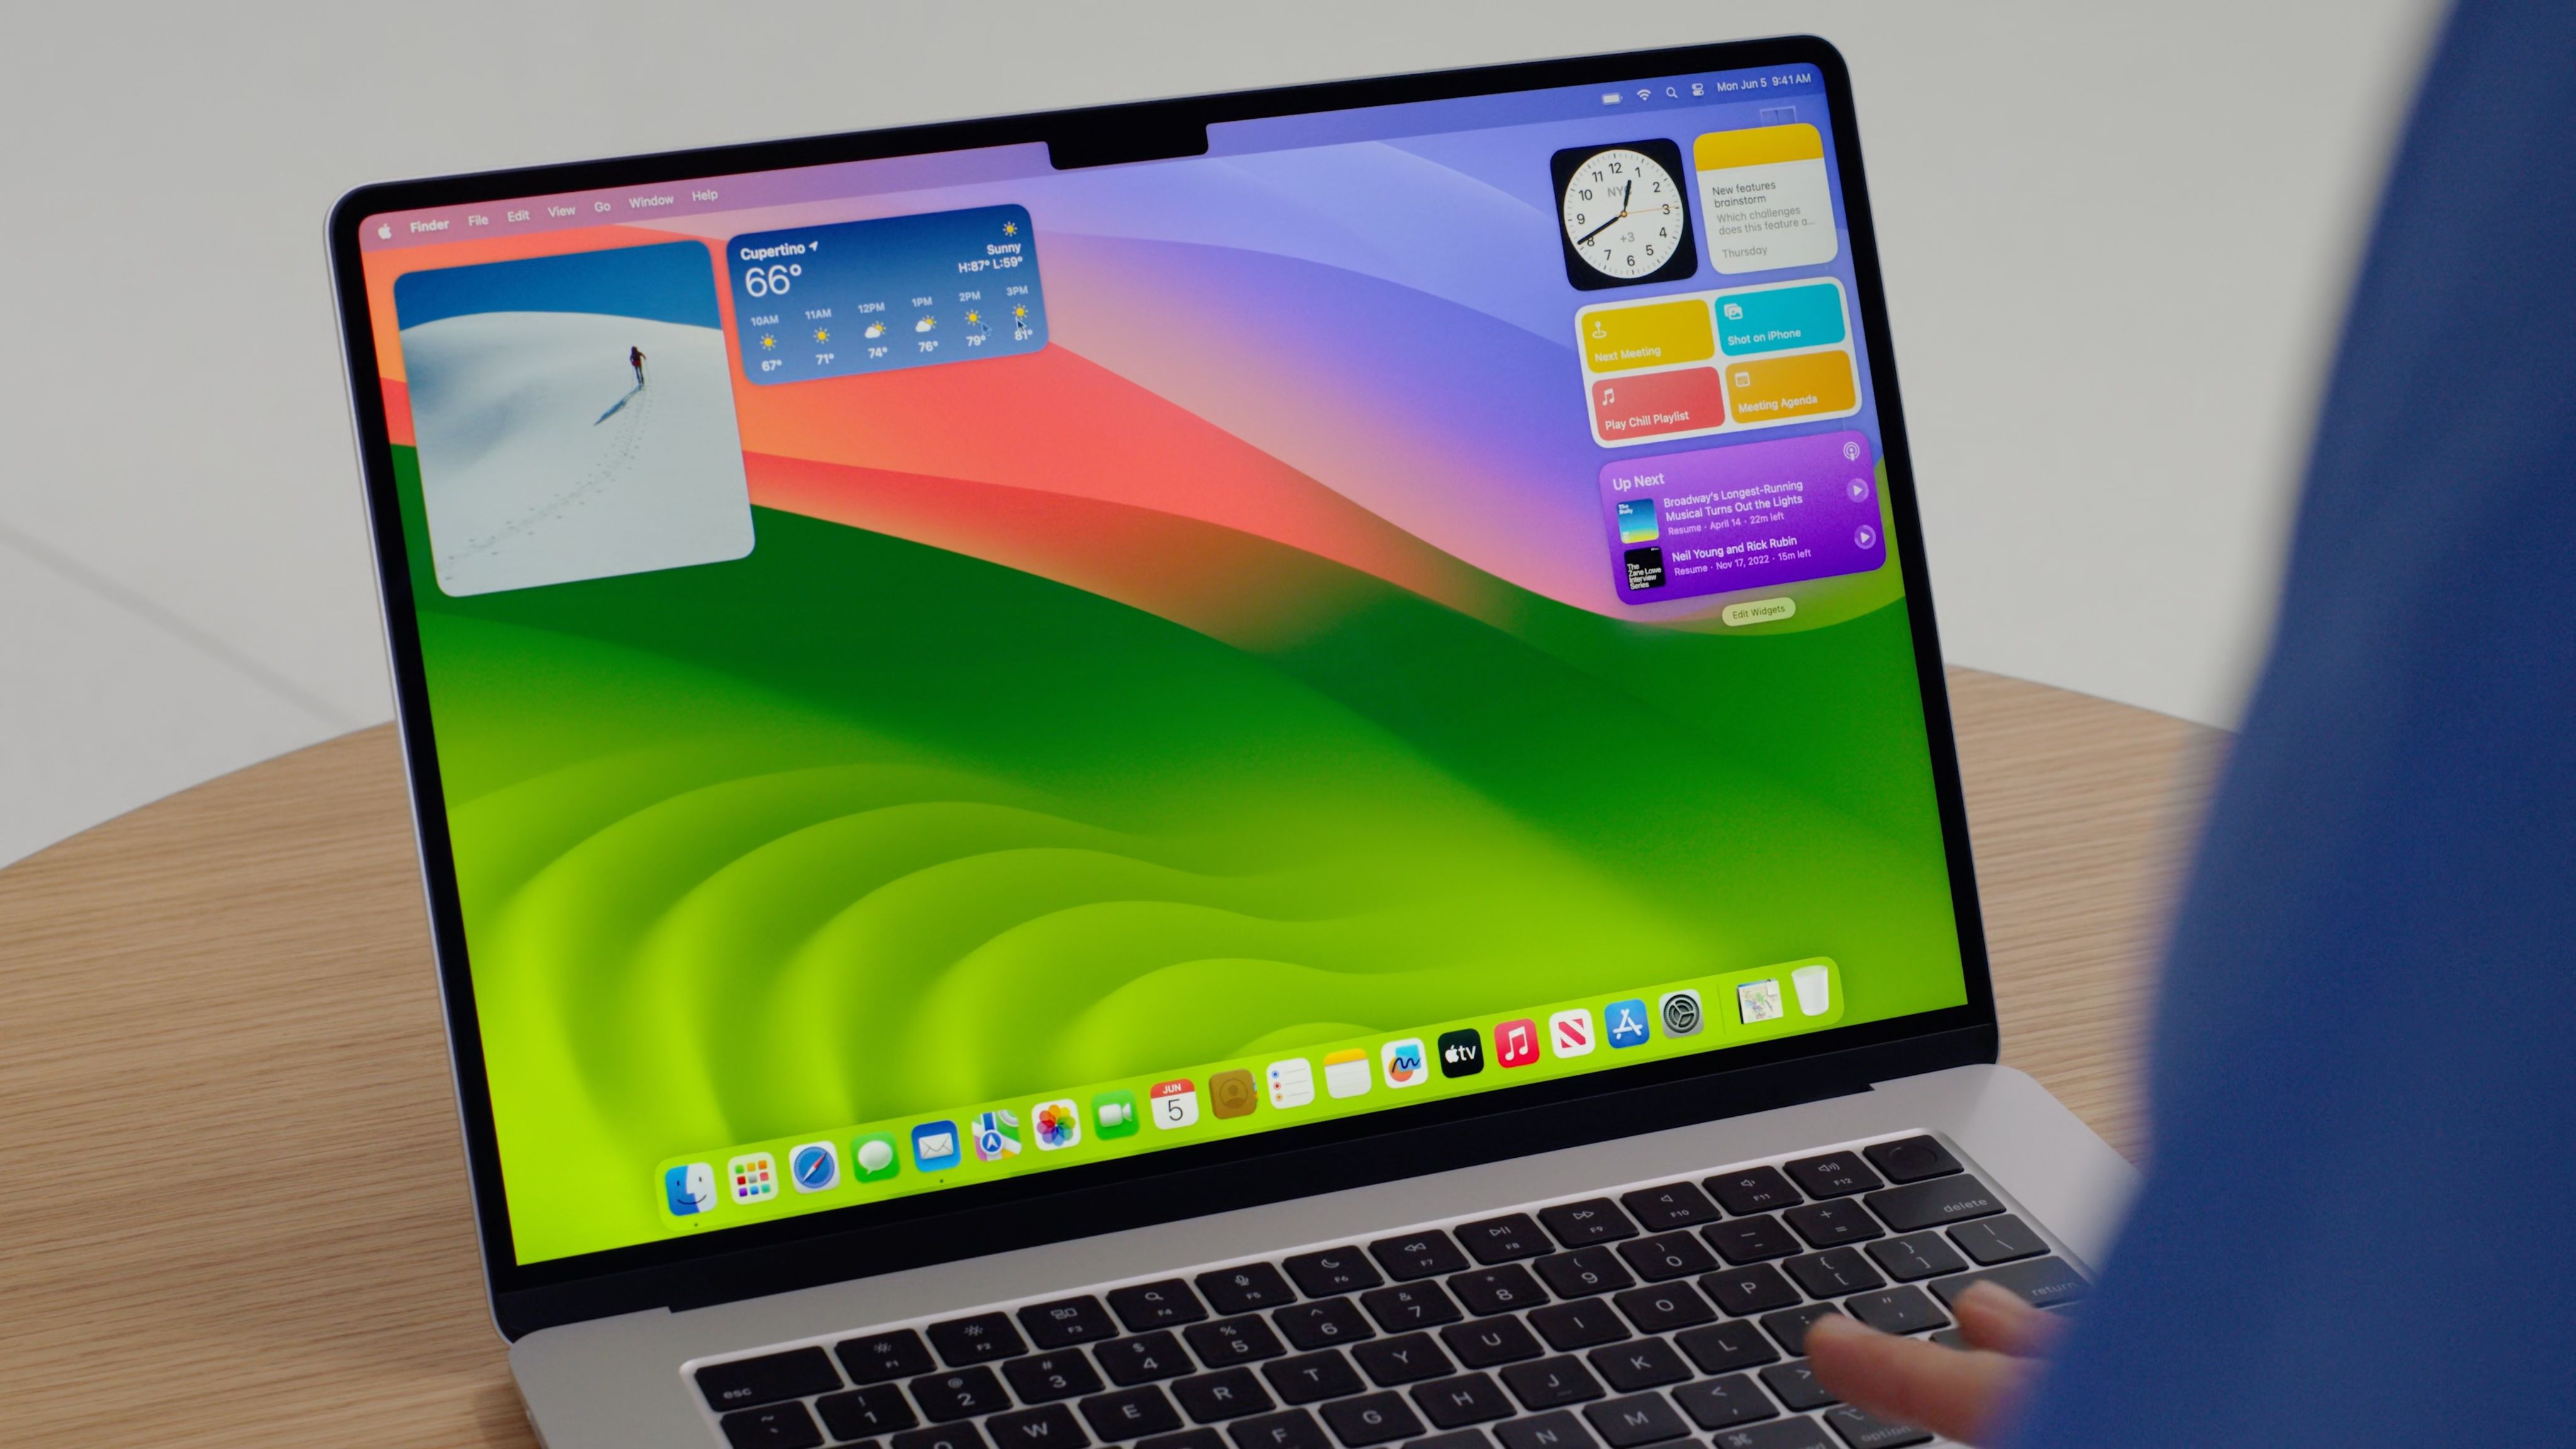
Next up is customizing the Dock on your Mac. If you didn’t already know, the Dock is the bar of icons at the bottom of your Mac’s screen, which by default holds several first-party applications and displays the ones that are open or were recently used.
While you can easily choose which applications are displayed on the Dock with simple drag-and-drop gestures, there are additional customizations that you can make to improve your user experience. The one that makes the most impact is the ability to automatically hide or show the Dock, which gives you access to a lot more screen real estate.
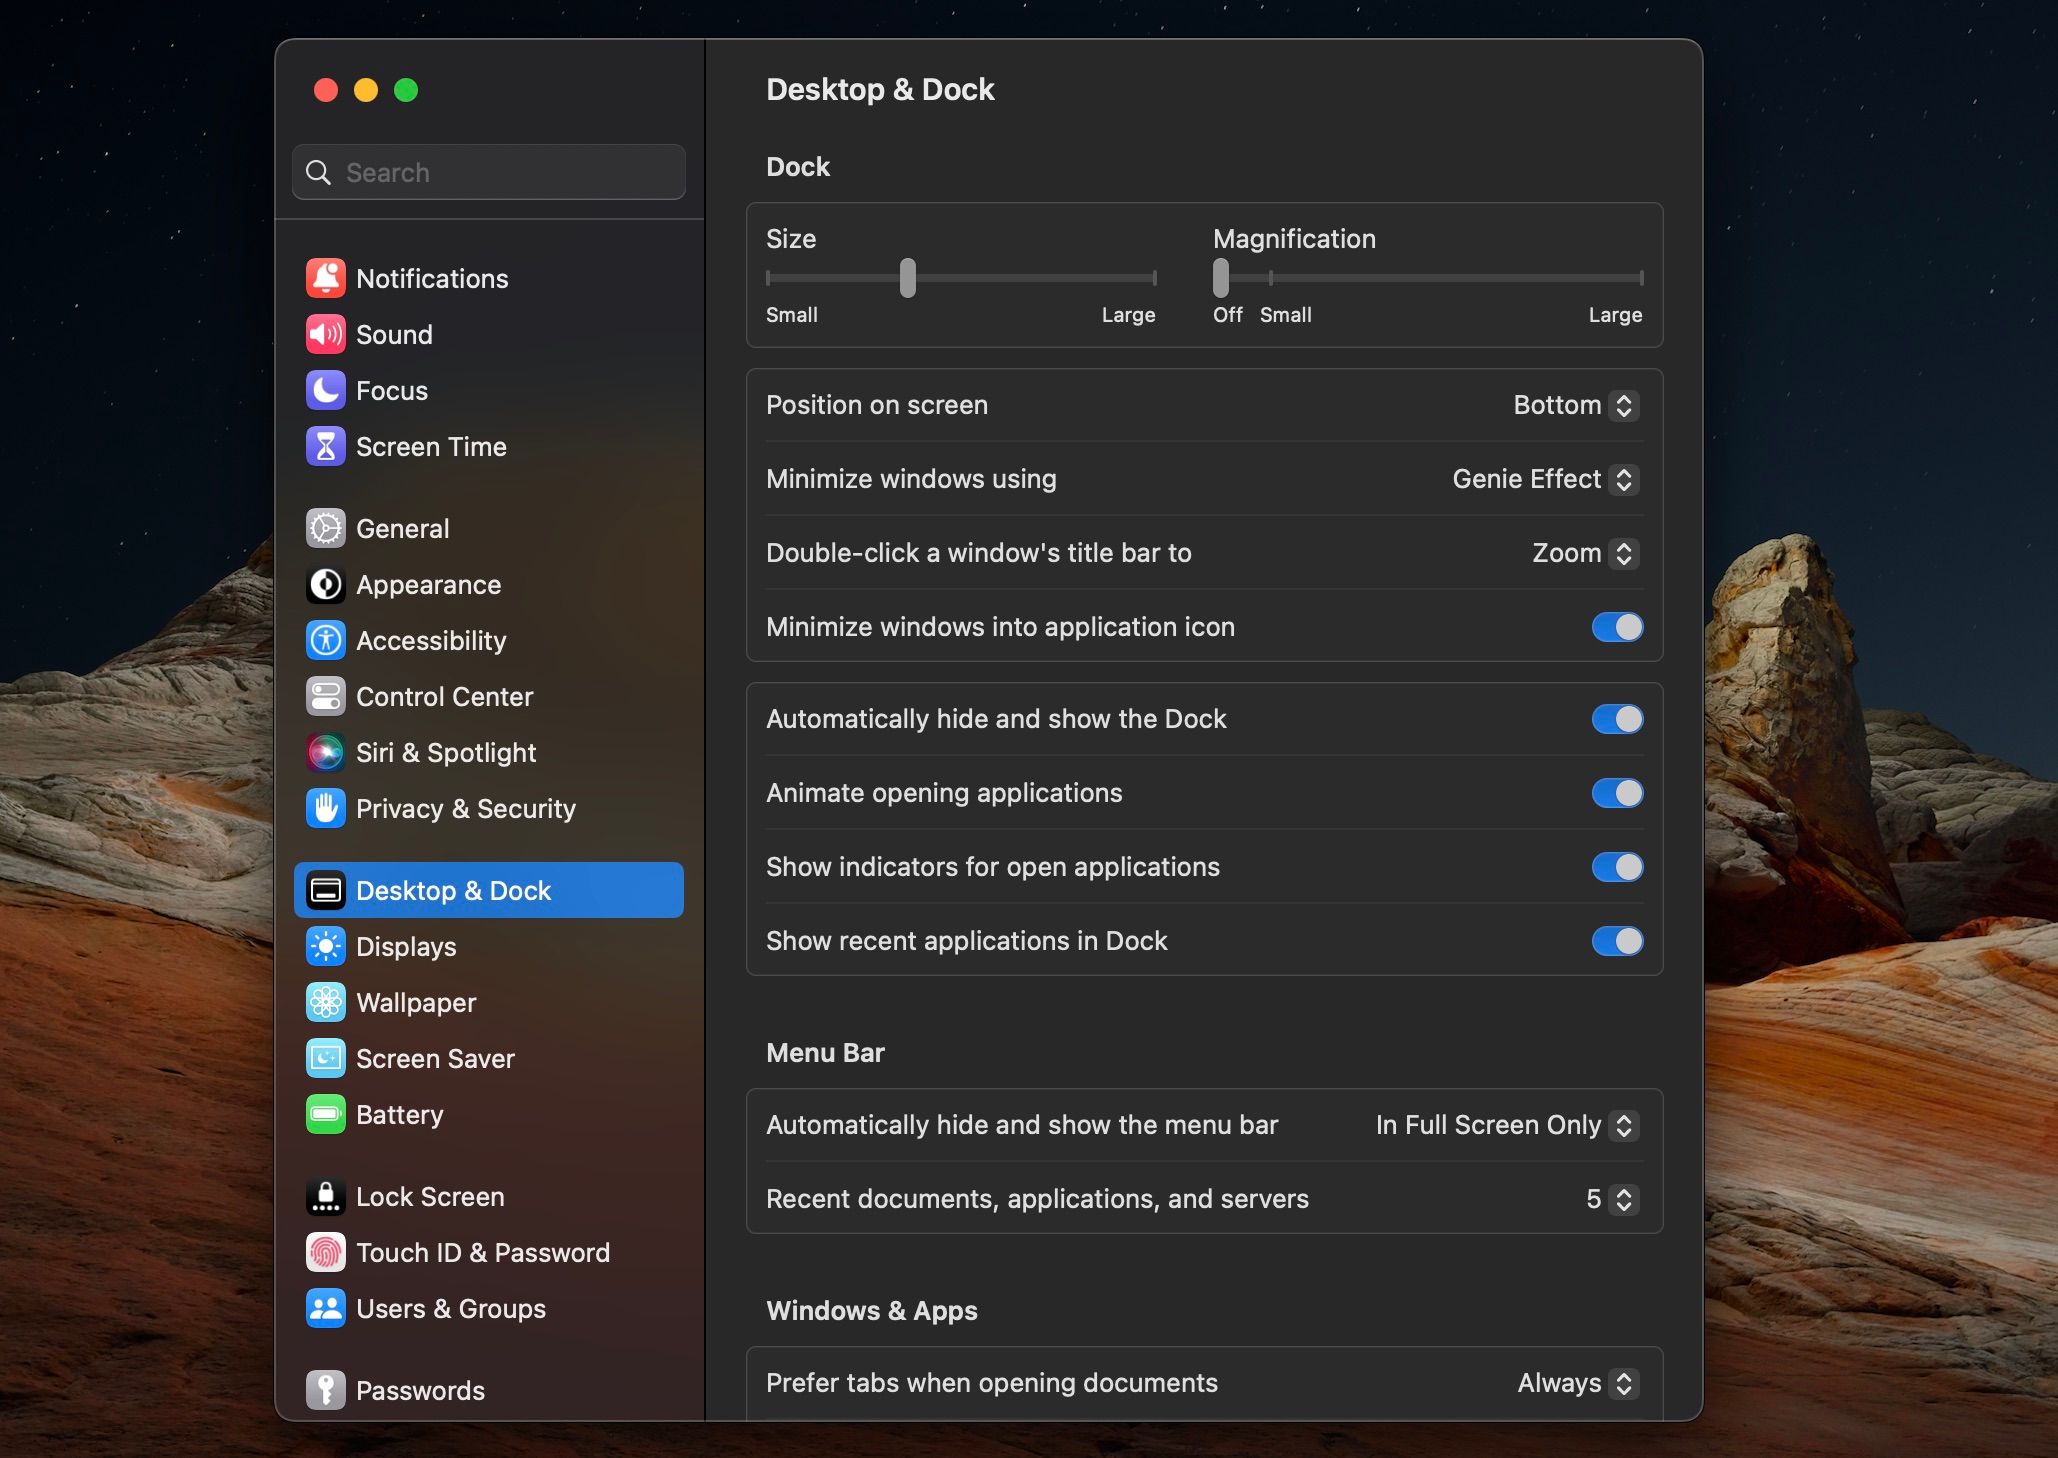
To customize the Dock to appear and disappear automatically, open System Settings from the Apple menu (the Apple logo is located in the top-left corner of your screen) and follow the steps listed below:
- Click on Desktop & Dock to customize Dock settings.
- Toggle on Automatically hide and show the Dock.
You can also choose to resize the Dock and customize its animations and other features in this subsection of System Settings.
4. Change trackpad settings
If you’ve got a Mac, be it a MacBook or a desktop machine, a trackpad is one of the best tools to use on macOS. The fact that many interactions with the operating system revolve around multiple finger gestures makes it all the more useful.
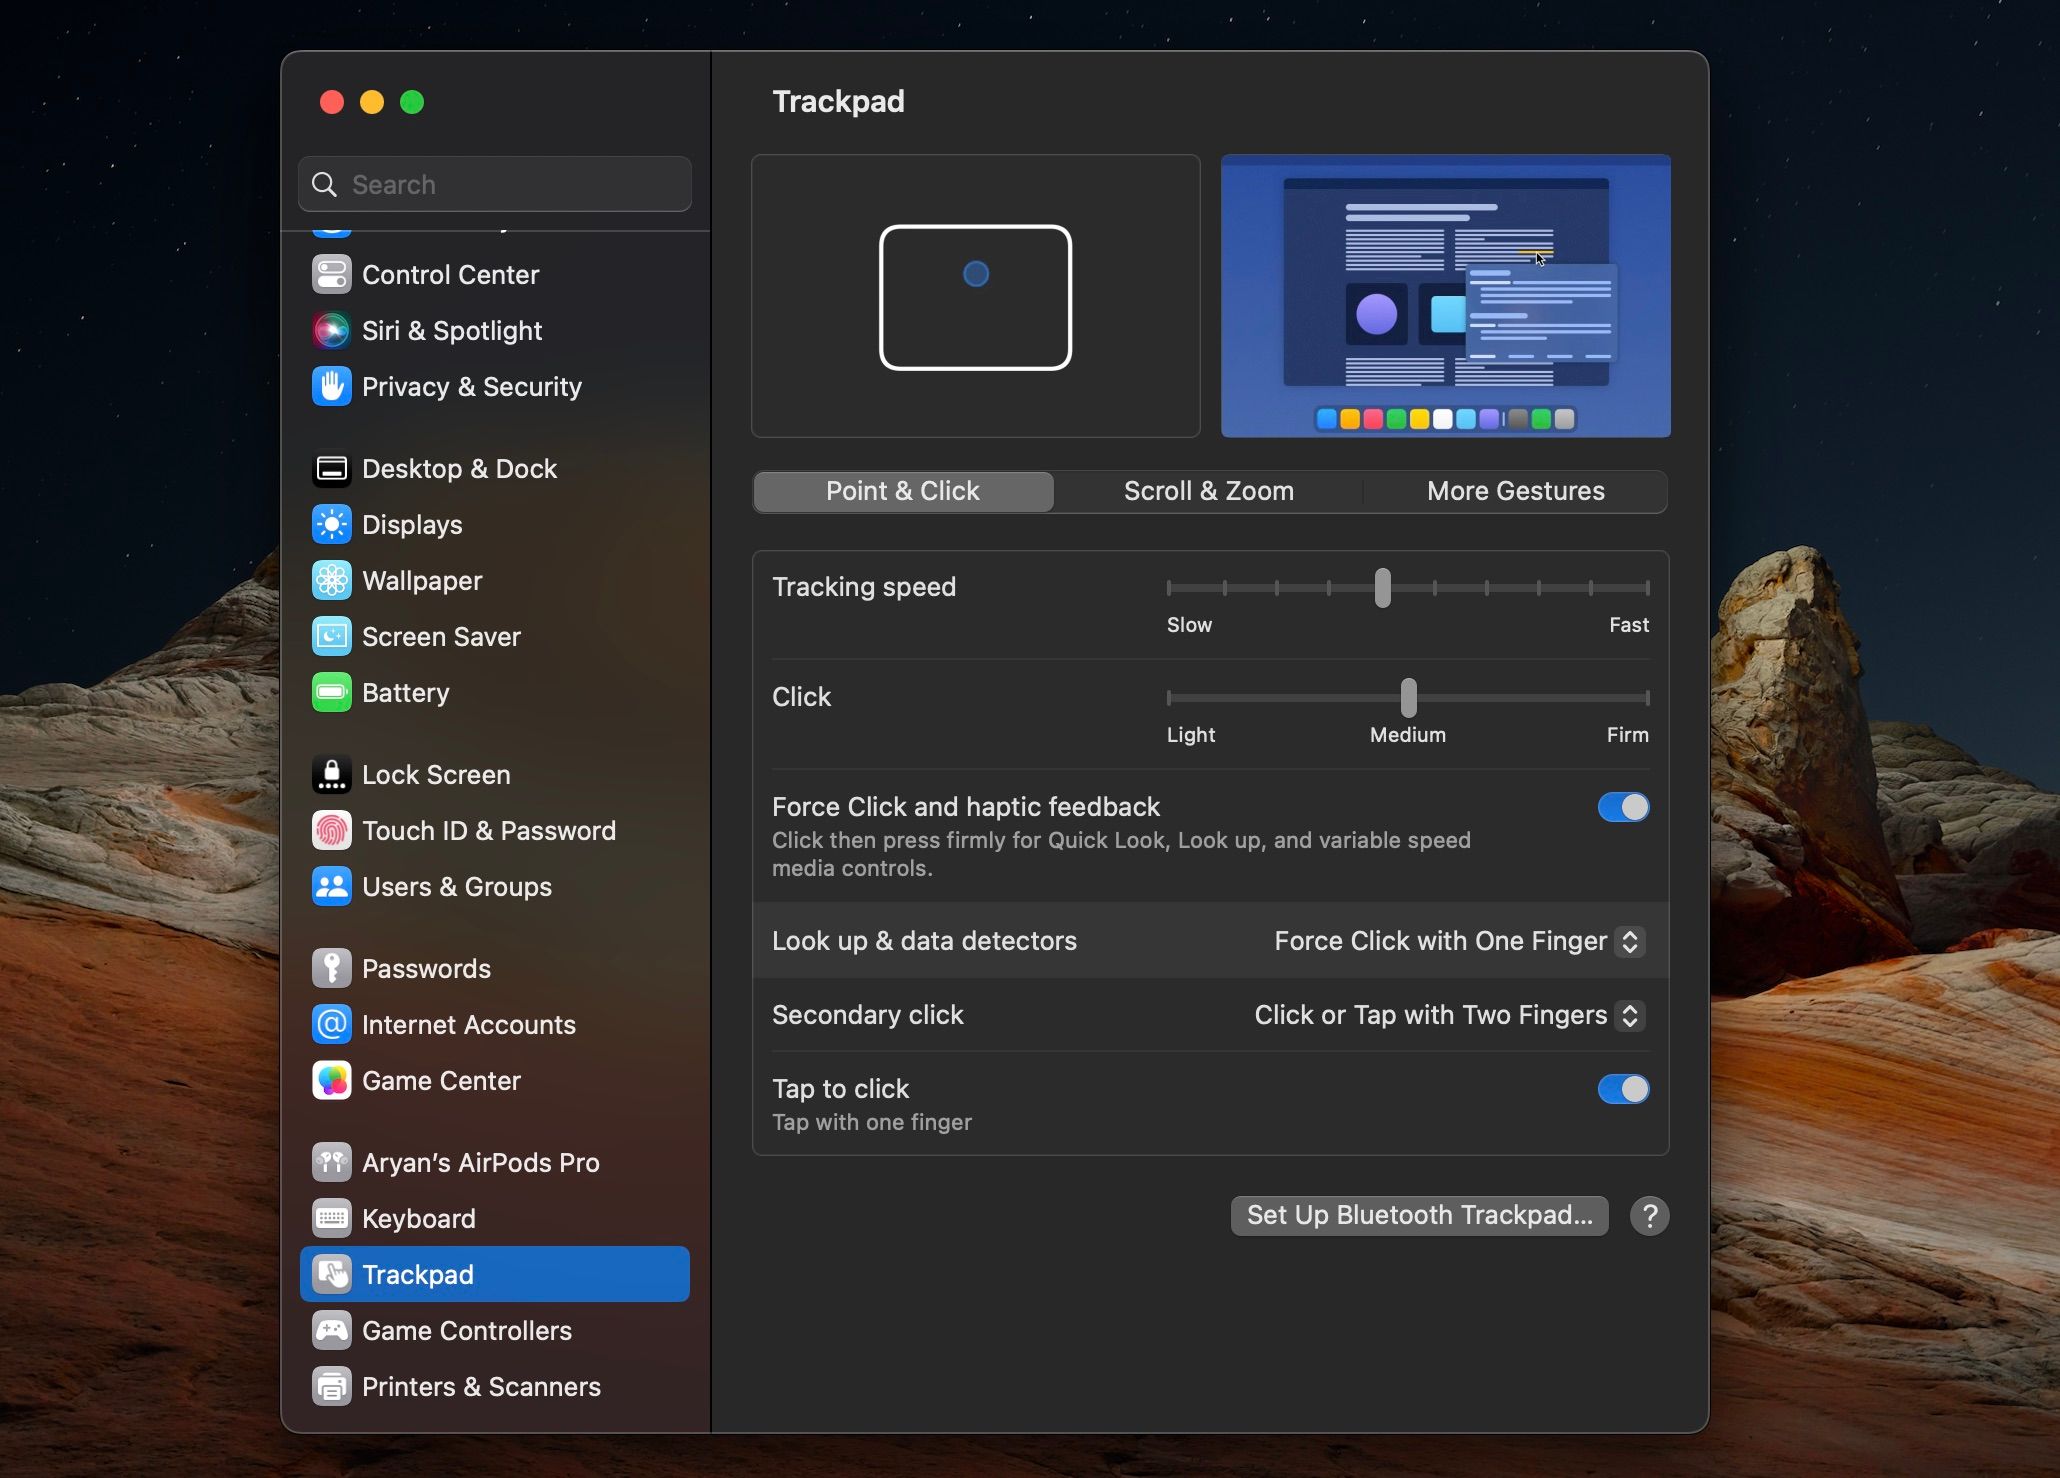
Hence, configuring the trackpad that’s in use with your Mac to your liking is an important component of the experience. To do this, head into the Trackpad section of the System Settings, where you can make changes to the Point & Click and Scroll & Zoom features of the trackpad in use, along with more gestures. Also, we’d say keep Tap to click if you’d like to simplify your interactions with the operating system.
5. Make Spotlight more effective
A feature built into macOS, and one you will also find in iOS and iPadOS, Spotlight is a quick search tool that can find anything on your computer, be it a document, an image, a contact, or a location; invoke the feature and type in your query. It also supports the conversion of metrics and calculations, in case you often need such tools. To access the feature, press the Command button + spacebar.
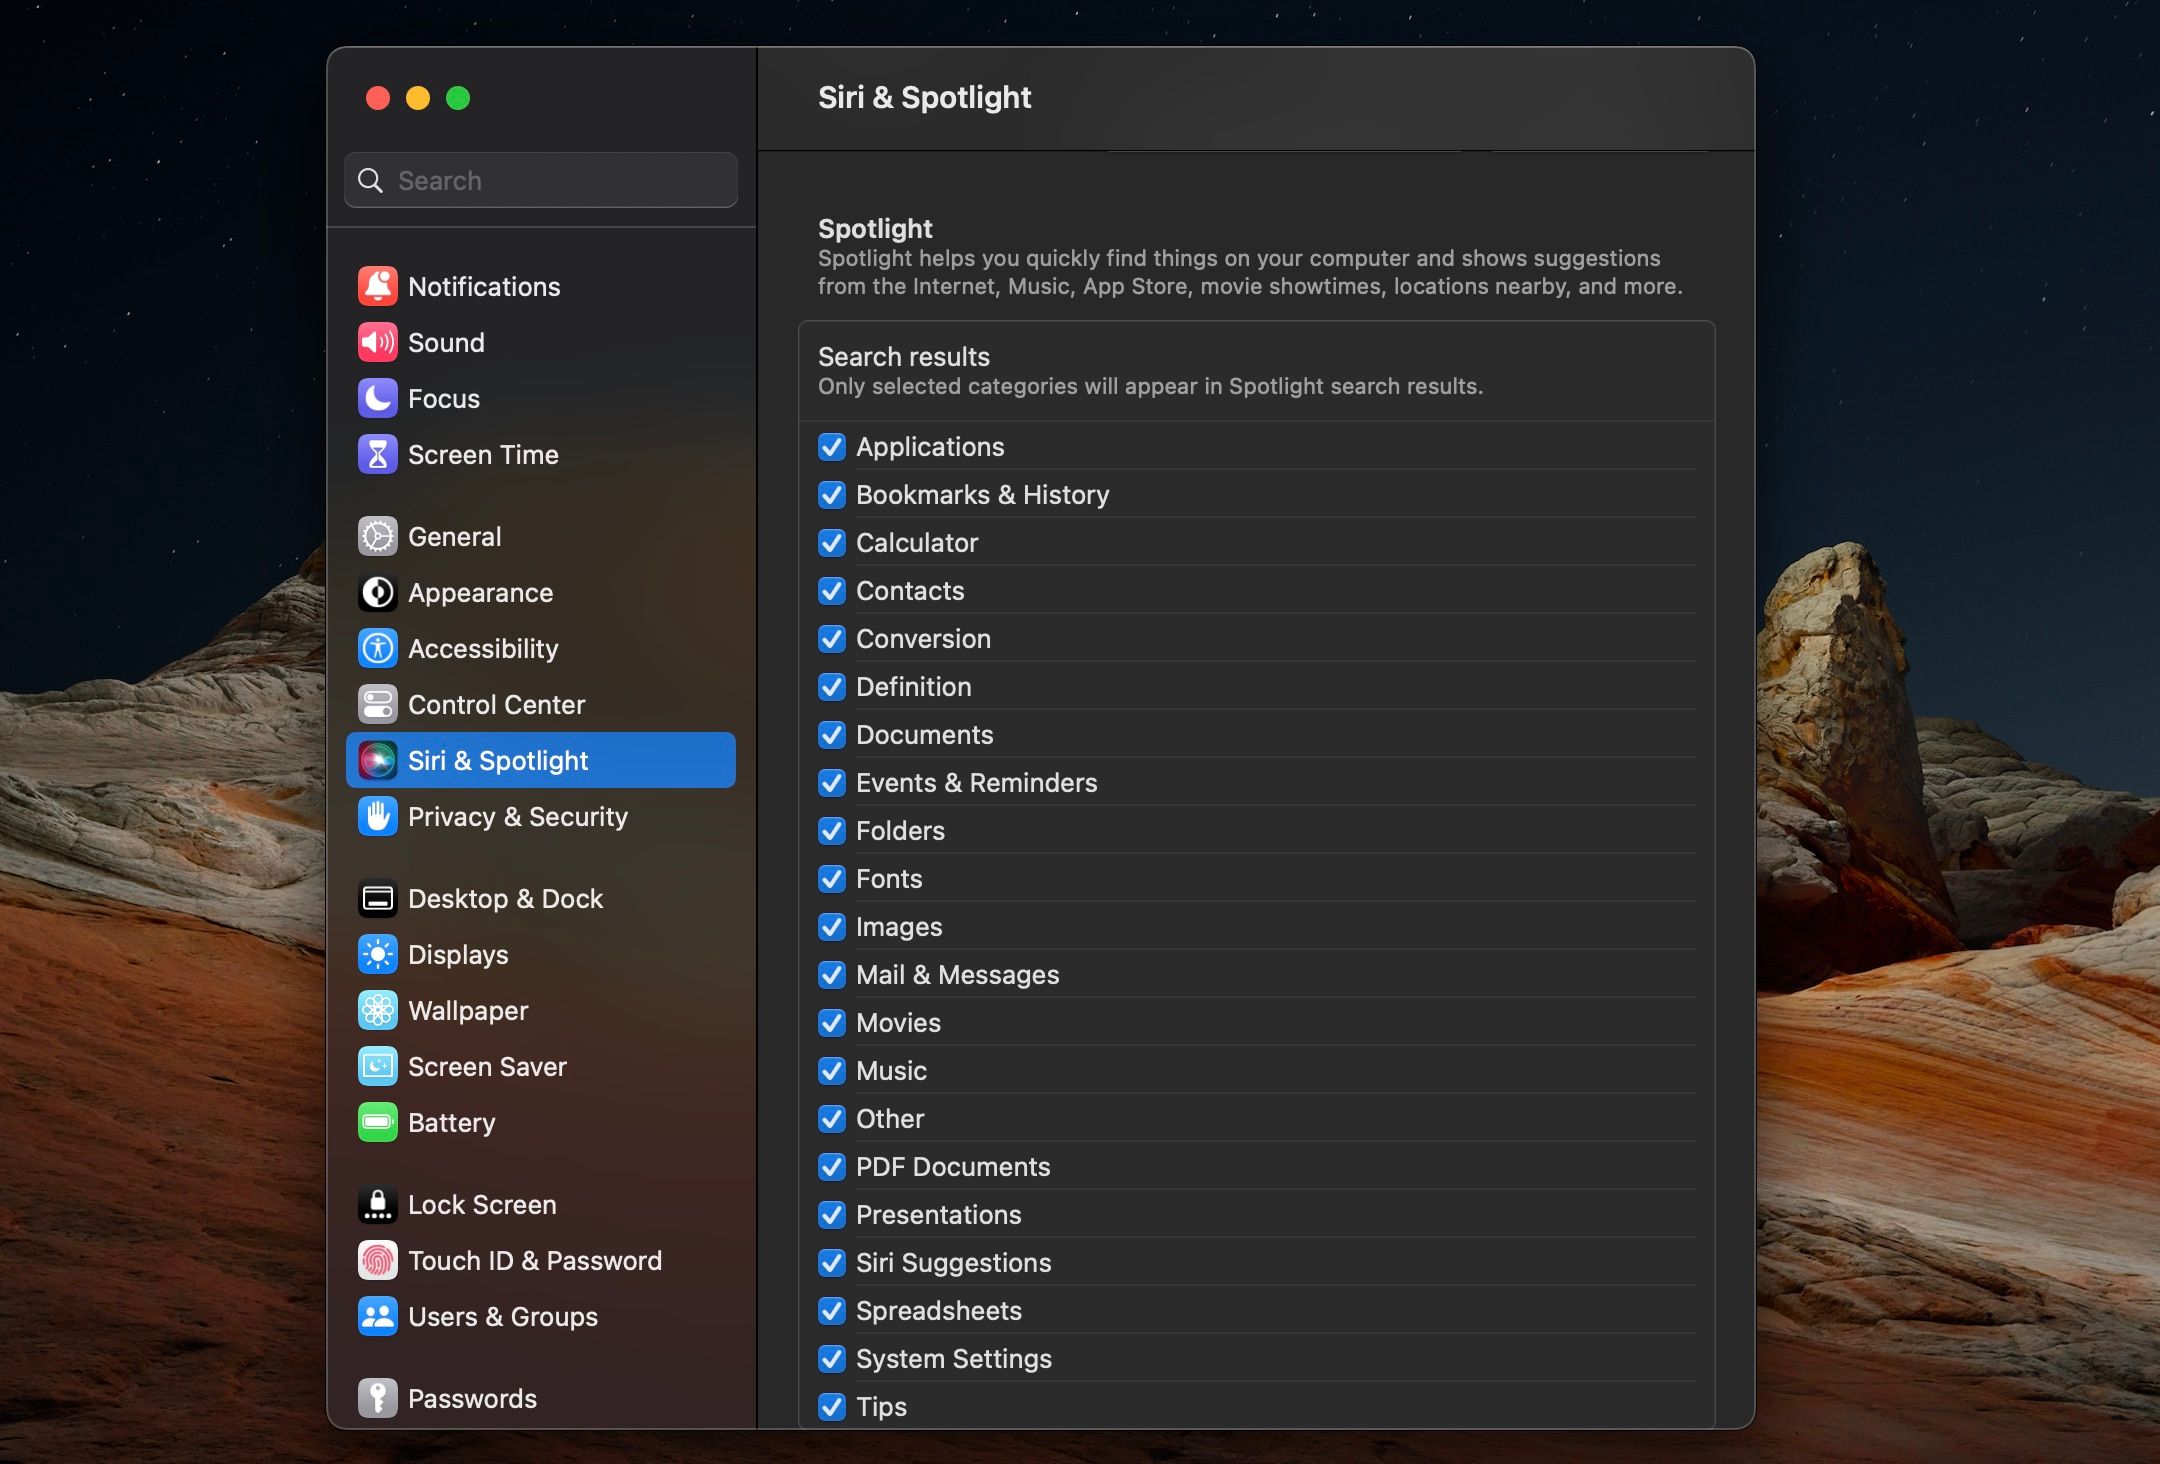
But while the number of results makes Spotlight quite versatile, you can turn it into a tool that only returns specific results, making it more effective for your use case. To do this, open System Settings and follow the steps listed below:
- Locate the Siri & Spotlight button.
- Under the Spotlight subsection, unselect the checkbox next to the categories of results you do not want to view.
6. Setup multiple desktops on Mac
The next thing to learn about a macOS device is how to create multiple desktops. Using more than one desktop is a great way to segregate your work, as it can even help keep the personal separate from the professional without much effort. I primarily use different desktops for communications, writing, bookkeeping, and personal files.
To create multiple desktops on macOS, follow the steps below:
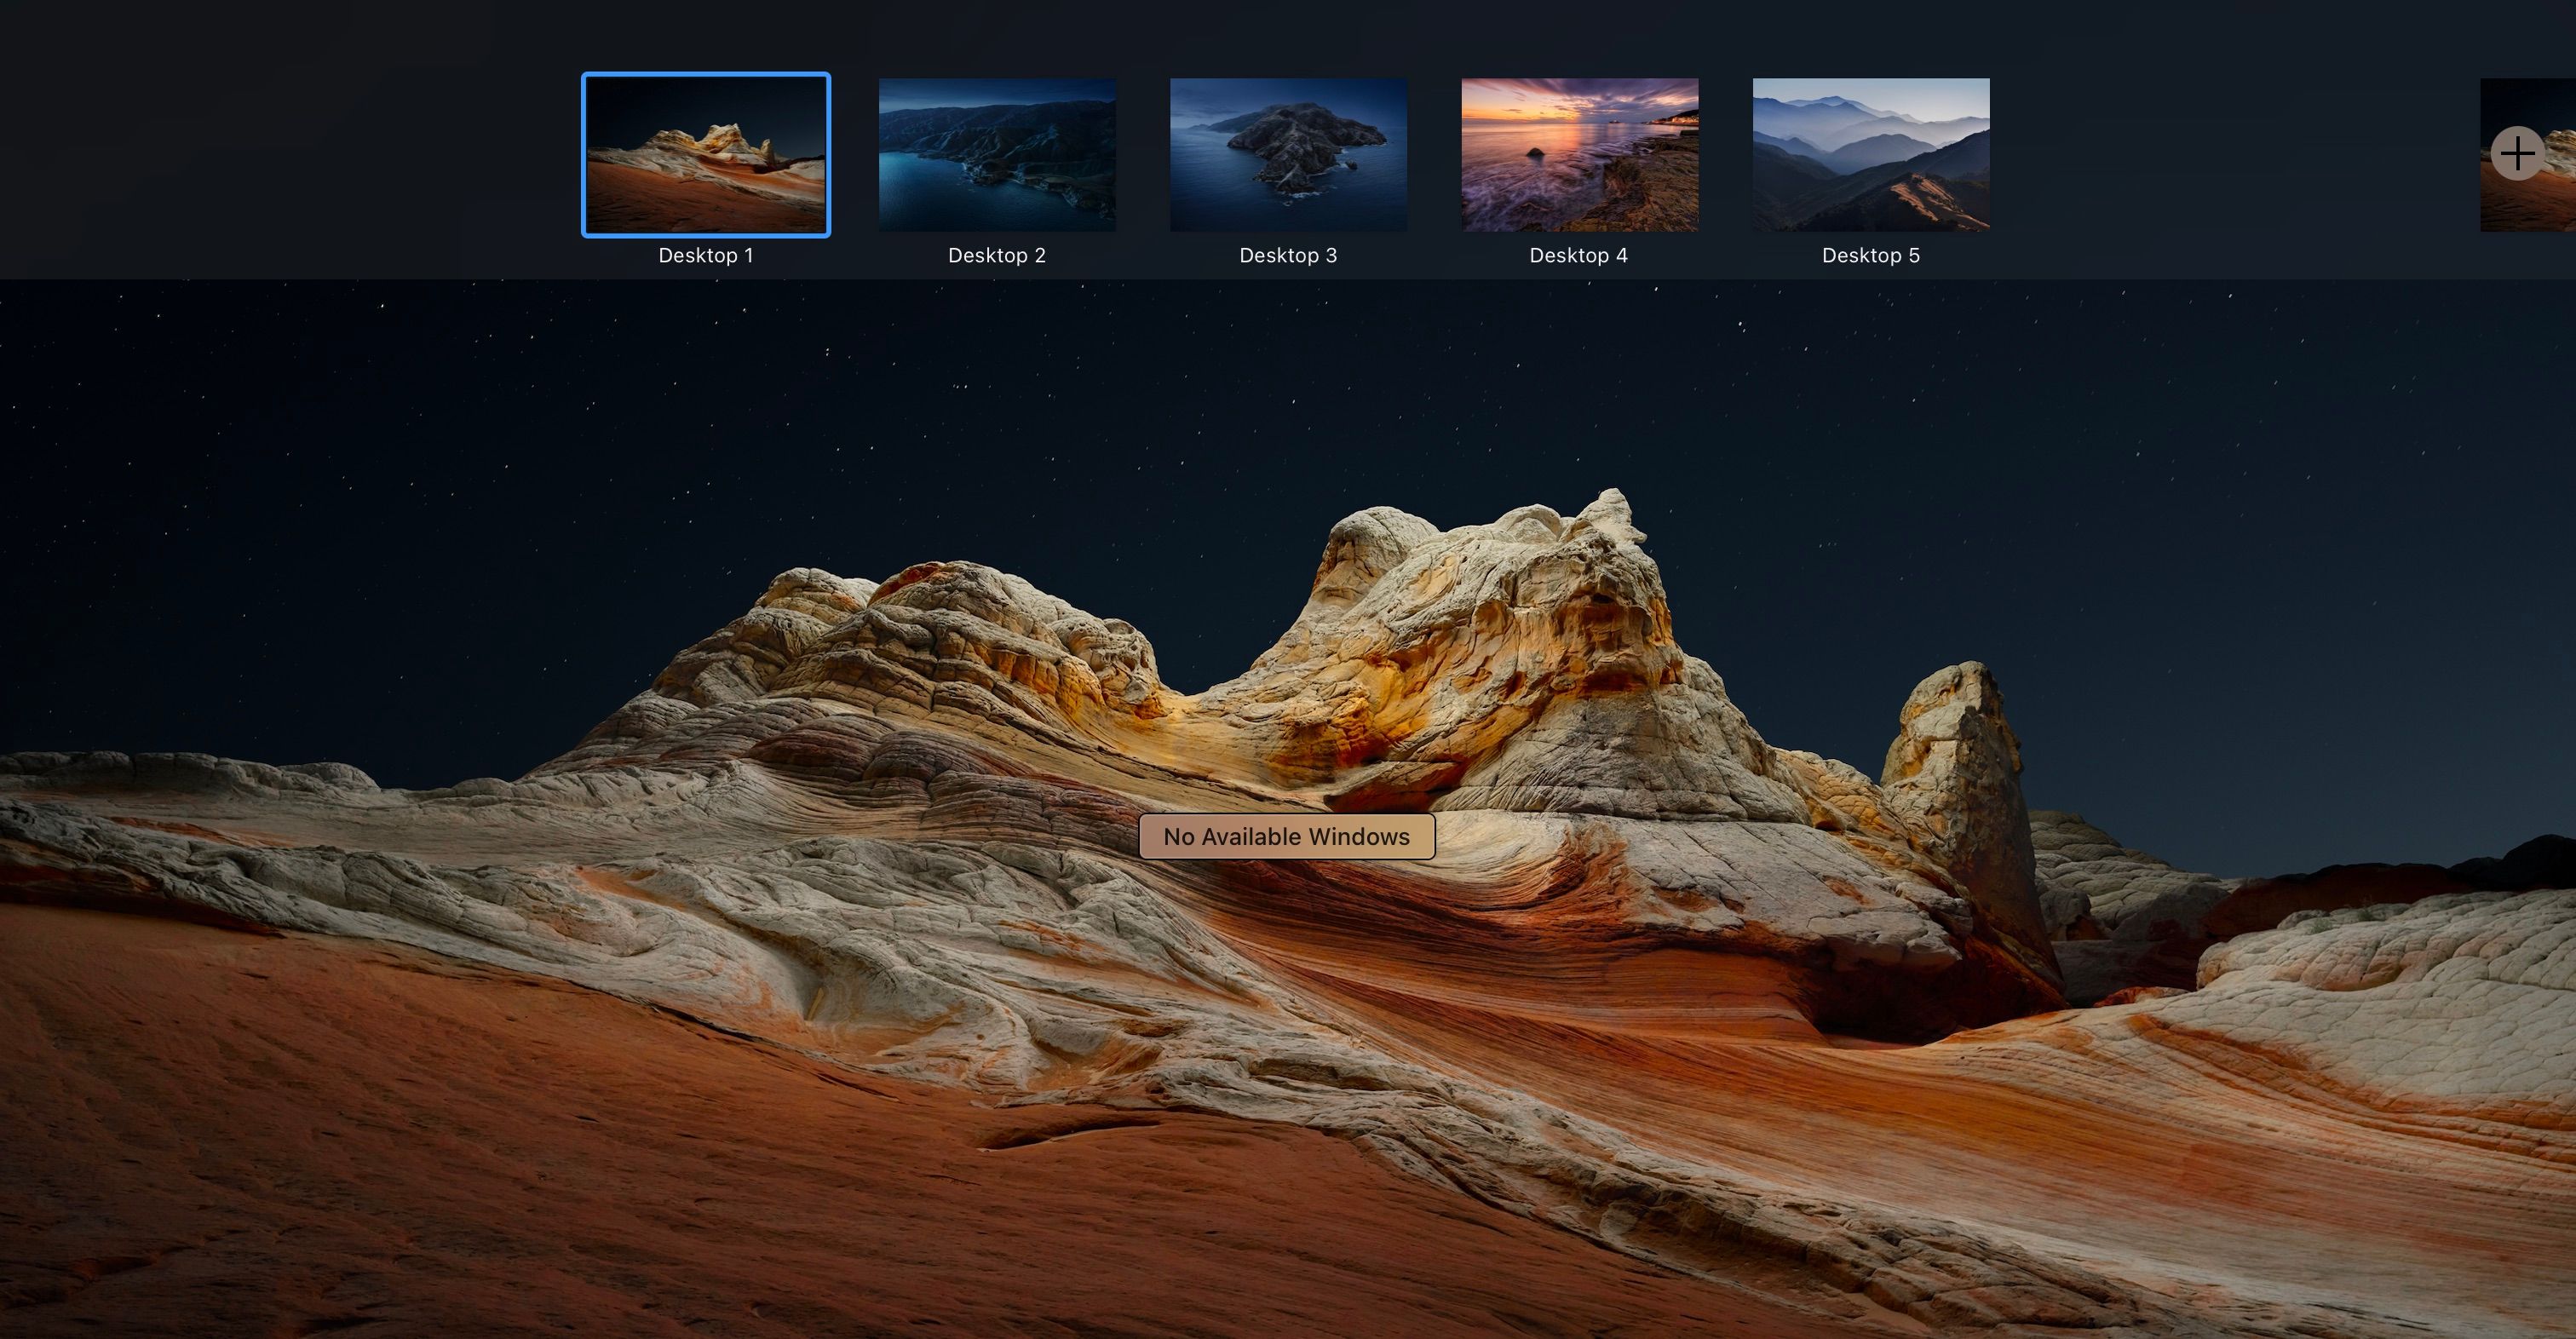
- Access Mission Control with a three-finger swipe up.
- At the top of the screen, you’ll notice the various desktops you have open. Tap the plus (+) sign in the top-right corner to add more.
7. Learn how to Force Quit apps on Mac
And last on the list of things to know is how to Force Quit applications on Mac. The feature has been a great addition when dealing with computers, as it often comes in handy if an application isn’t behaving as intended, whether stuck on a loading screen for too long or unresponsive to interactions.
To forcefully close an application on a Mac, click on the Apple menu in the top-left corner of the screen and choose the Force Quit option. Check the application name next to the Apple menu icon to ensure you’re doing this to the right application. And the keyboard shortcut to do the same is Option + Command + Escape.
Source link

